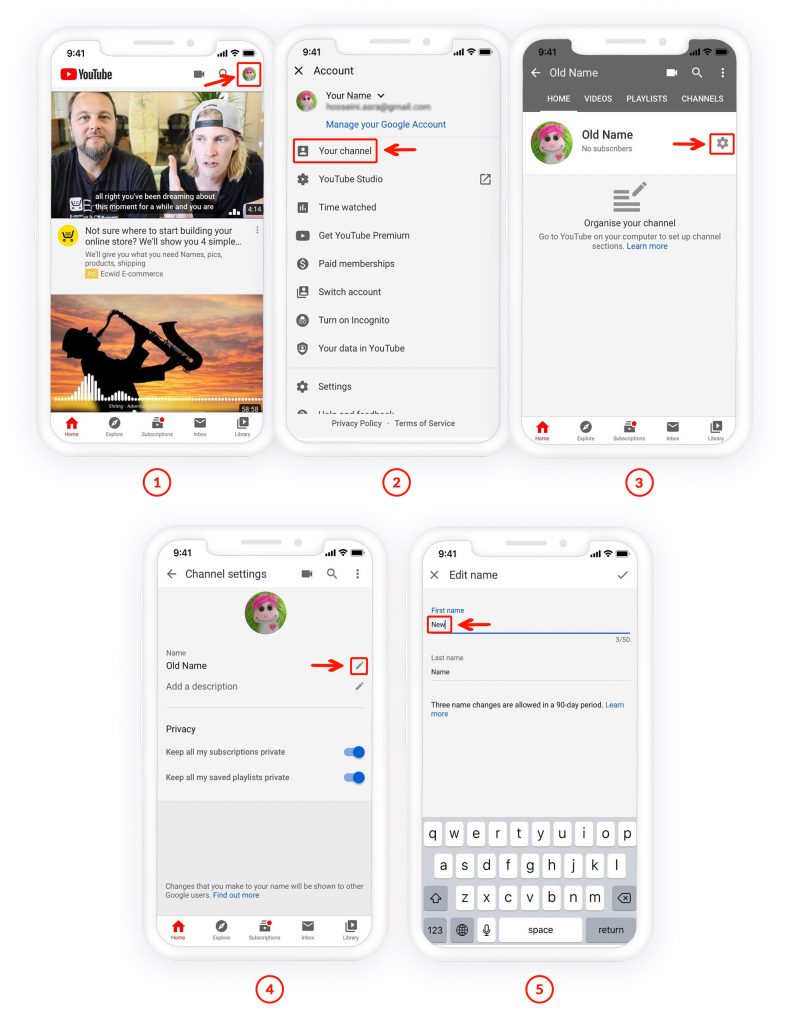
Google+ presents a social platform that you can use to build a significant web presence for you and your brand. When people search for you on Google, one of the first results will be your Google+ profile.
By including your business information in your Bio profile _ such as your website link or your products _ and making it public, a quick search for you on Google would provide potential customers for links and information about your brand.
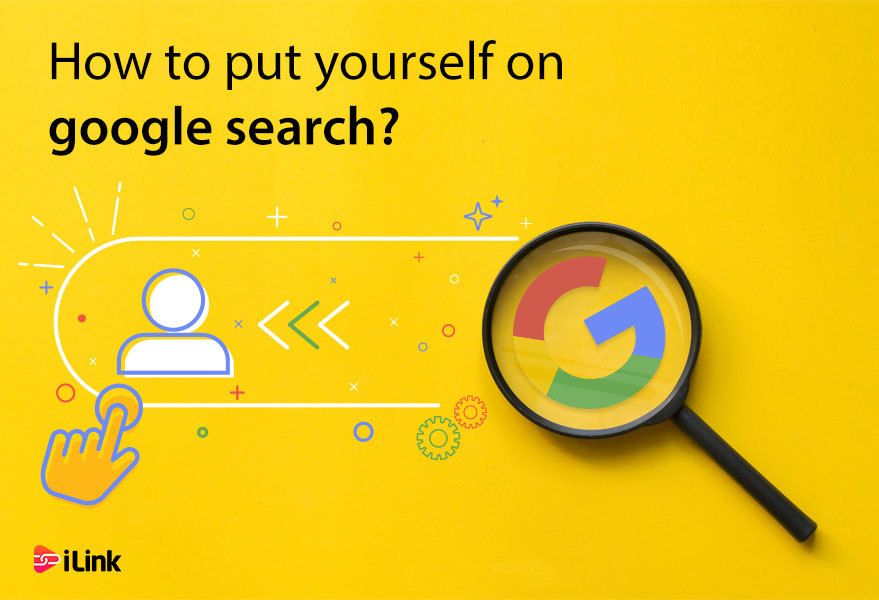
How to put yourself on google search?
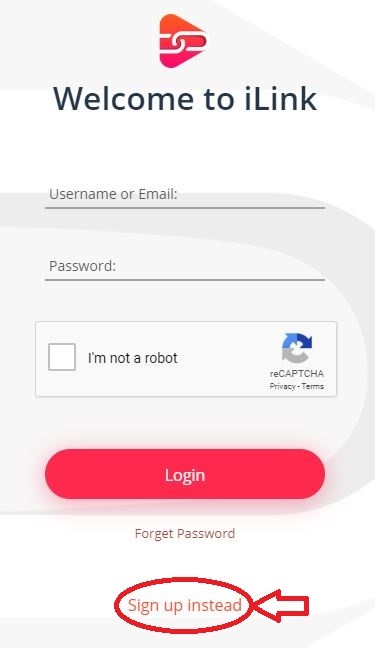
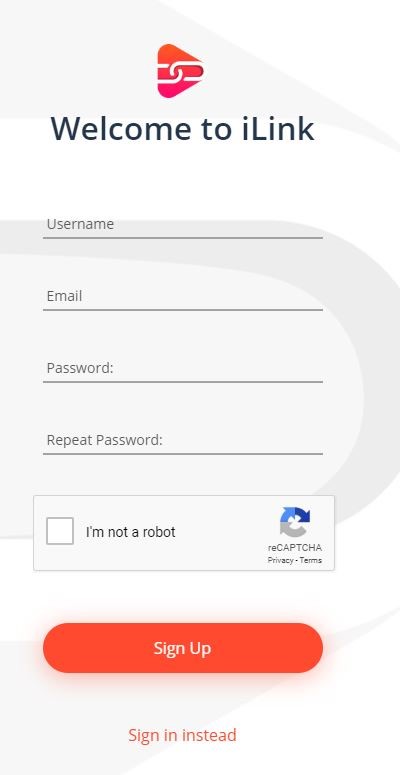
If you want people to find you when they are searching on the internet, you can create a landing page using iLink, and add all your information there. It would be great to add all the necessary information, and all names people may know you on those.
To create a landing page and add your biography:
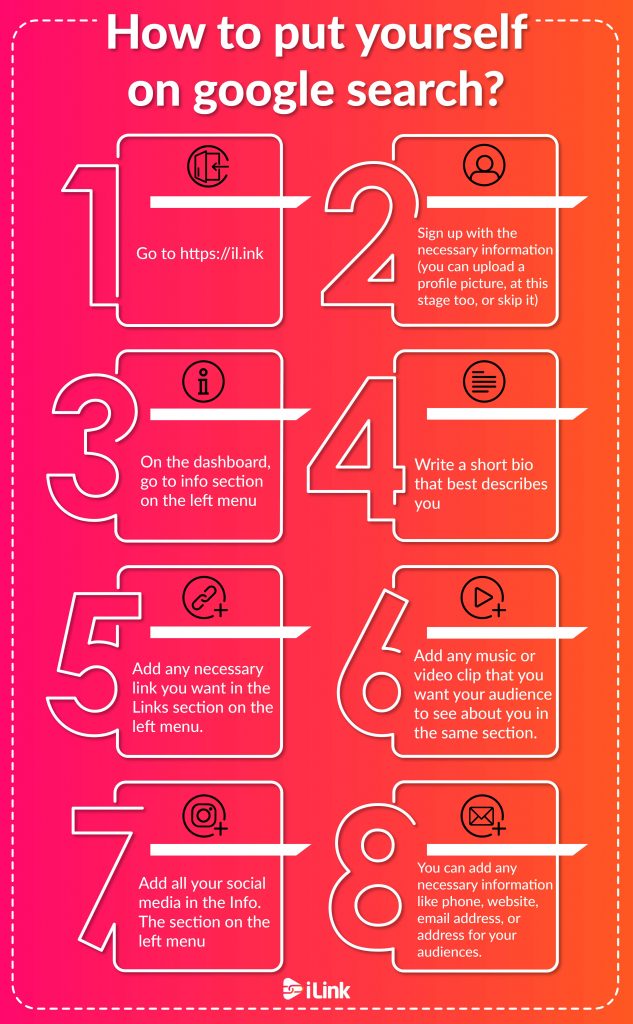
- Go to https://il.ink
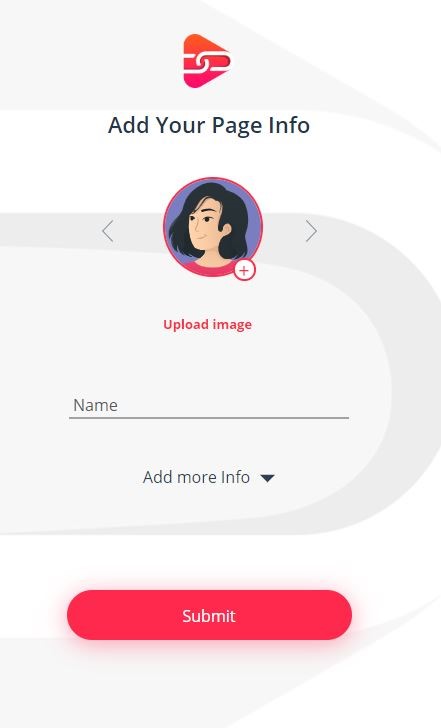
- Sign up with the necessary information (you can upload a profile picture, at this stage too, or skip it).
- On the dashboard, go to info section on the left menu
- Write a short bio that best describes you
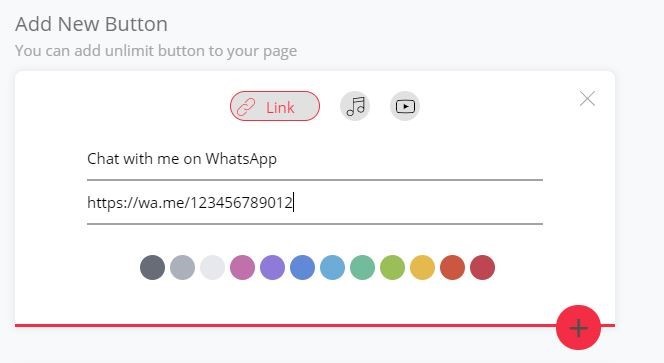
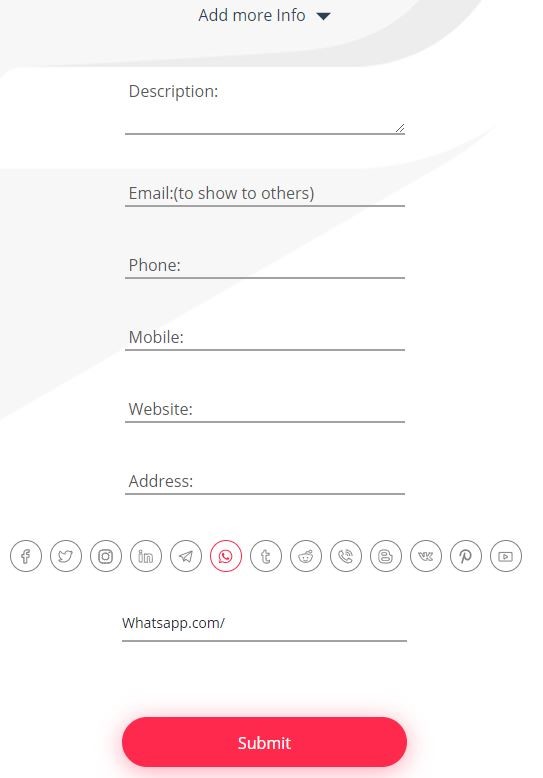
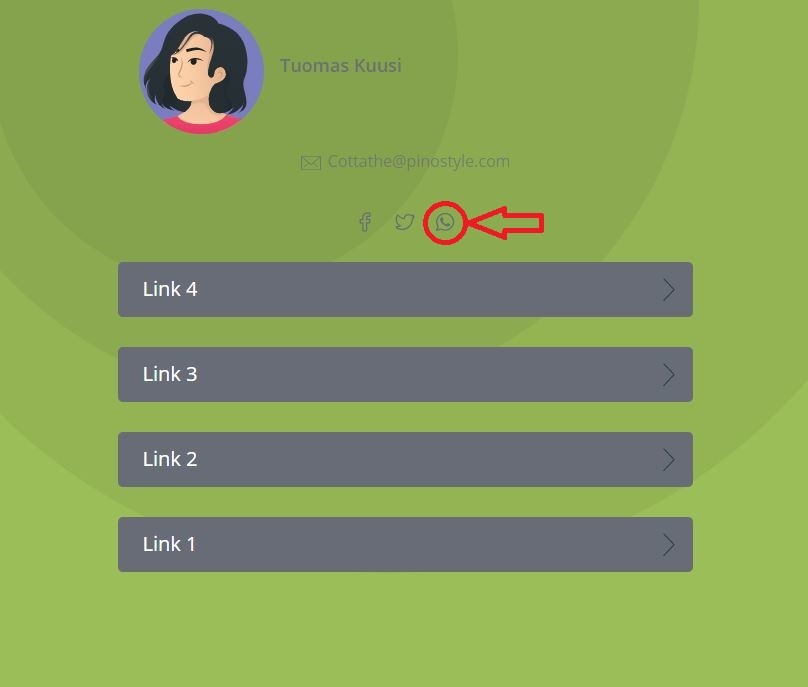
- Add any necessary link you want in the Links section on the left menu
- Add any music or video clip that you want your audience to see about you in the same section
- Add all your social media in the Info. The section on the left menu
- You can add any necessary information like phone, website, email address, or address for your audiences.
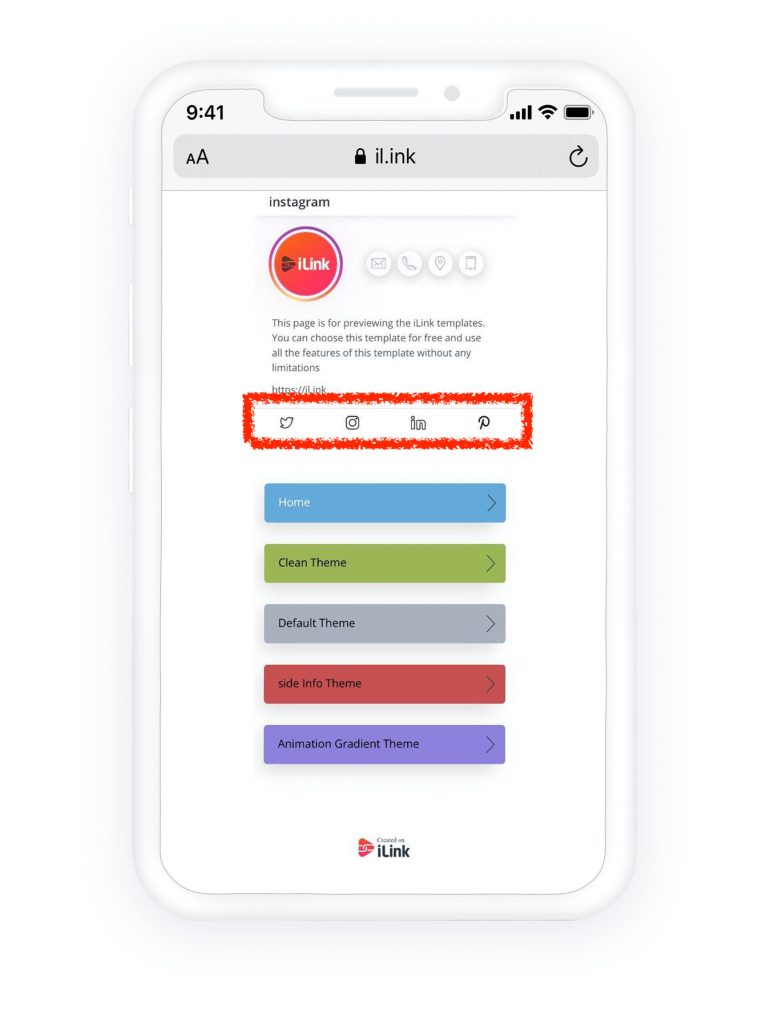
Check the preview of your landing page on the right side of the dashboard. You can check it for all three types of devices, desktop, notepad, or mobile.
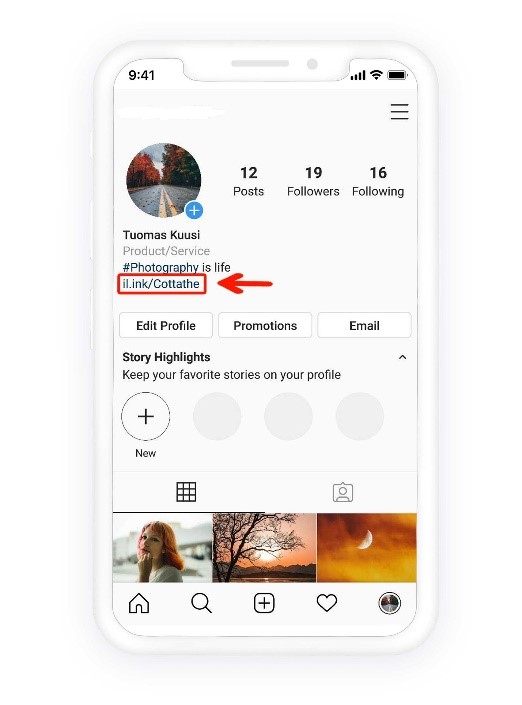
Now, everyone searches on the internet; they can see your landing page (like a website). It is free, and you can set it up fast. The excellent point is that you can customize it as you prefer, according to your brand, for example.
If you are a writer, photographer, or any job you have, you can add your portfolio there too. The best point about the iLink profile is that you can share it on your social channels.
You can also sell any products there or add any links to download your eBooks or PDFs.


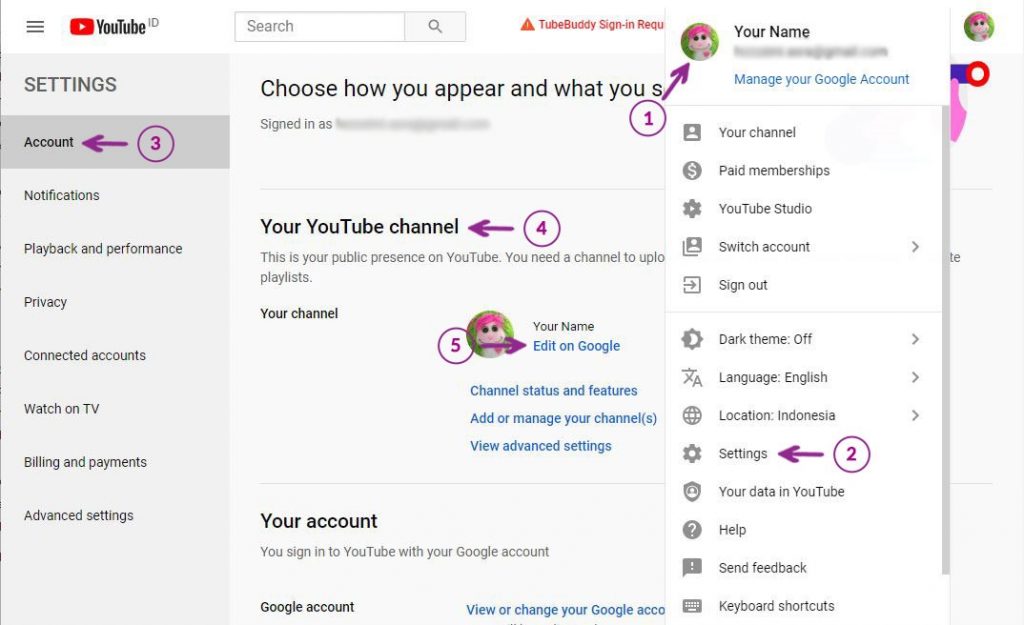
How to write a Google profile Bio?
- Log in to your G+ account, and the main Google timeline shows up.
- Click on the “profile” icon on the left side of the screen.


- Click the “About link” and after that “Edit profile” button.


- Click on the “introduction” header to edit your Bio. You can write about yourself or your brand in plain text.


- This information will appear in Google searches when customers search for you.


The G+ profile includes these sections:
- People
- Story
- Work
- Education
- Places
- Basic information
- Contact information
- Links
How should my G+ Bio look like?
You should write a Bio that advertises you and your brand. There are no length limitations, so you can include as much information as you like. However, only a small part initially appears in a Google search, so you should put important information on the top.
- you can use font effects such as bold and italic and lists, but don’t over-use them, because they can make your profile look too crowded.
- You can add a link to your website or email, by:
- Highlight the texts
- Click on the link button on the editing menu
- Write the URL of your email or site in the link window
- Tap enter and done!
- Choose an access type such as “Public,” ”Extended circles,” “your circles” or “only you.”
“Public” allows everyone to see your profile.
“Extended circles” allows people in your circles and their circles to view your profile.
“Your circles” allows only people in your circle to see your profile.
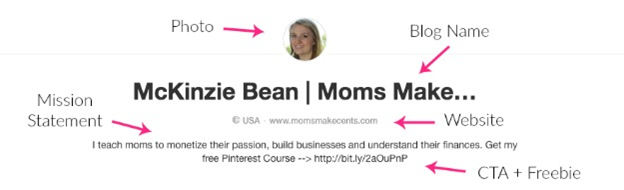
“Only you” will lock your profile as private. - your G+ introduction should include:
-what you are passionate about
-what type of content you will share
-a brief story of yourself
-social media and contact information
-why people would like to circle you. - After editing your profile Bio, you should click on the “save” button, and you are all done!
- After that, you can search your name on Google to see if your G+ account shows up or not. But remember you should be public for that.
As I mentioned before, the story section is one of the most critical parts of your G+ profile, fill it today and let yourself be verbose, not pompous.